LearnPress Lesson: Resolving Yellow Screen Issues in Atavism Unity 6 with Camera Stacking
- What causes the yellow screen issue in Atavism Unity 6?
- Can you add an Overlay Camera to multiple Base Cameras? If yes, how?
- How does the order of Overlay Cameras affect rendering?
In this lesson, you will learn how to fix the yellow screen issue in Atavism Unity 6 caused by missing Camera Stacking. The Universal Render Pipeline (URP) requires Camera Stacking to properly render scenes that use multiple cameras, such as overlaying UI elements on a 3D view.
Lesson Overview
- What is Camera Stacking?
- Why the Screen is Yellow in Atavism Unity 6
- How to Implement Camera Stacking
- Adding Cameras to a Camera Stack
- Removing Cameras from a Camera Stack
- Changing the Order of Cameras
- Script-Based Camera Stacking
What is Camera Stacking?
Camera Stacking in URP layers the output of multiple cameras to create a combined output. This is useful for scenarios like displaying a 3D model in a 2D UI or rendering a vehicle cockpit on top of a scene.
Note: Camera Stacking is not supported when using the 2D Renderer or VR Multi-Pass mode in this URP version.
Why the Screen is Yellow in Atavism Unity 6
In Atavism Unity 6, the yellow screen occurs because the project does not have Camera Stacking configured. This issue arises from URP expecting at least one Base Camera and one or more Overlay Cameras to render the scene.
How to Implement Camera Stacking
Follow these steps to fix the yellow screen and configure Camera Stacking:
1. Adding Cameras to a Camera Stack
- Create a Camera in your Scene. It will default to Render Type: Base, making it a Base Camera.
- Create another Camera and set its Render Type to Overlay in the Camera Inspector.
- Select the Base Camera.
- In the Inspector, scroll to the Stack section, click the + button, and add the Overlay Camera.

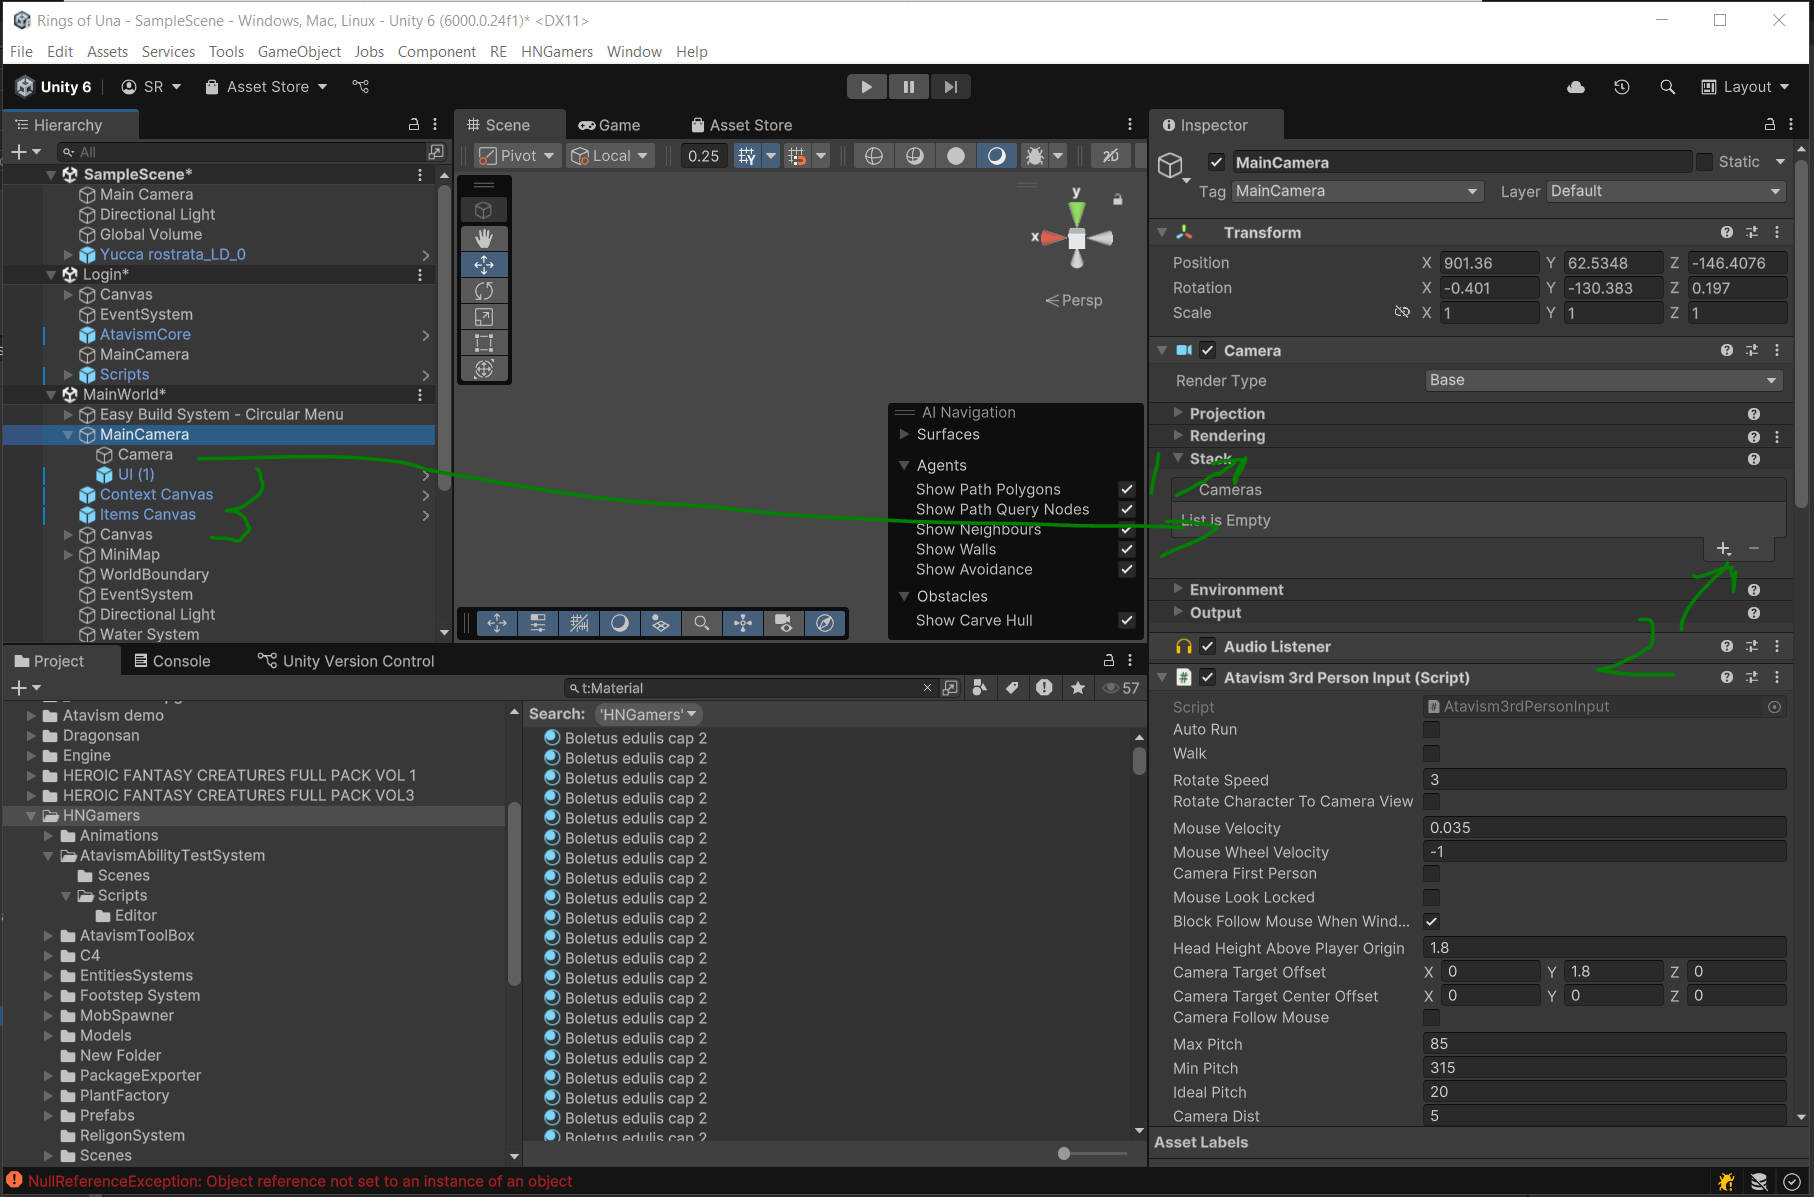
Unity will now combine the outputs, fixing the yellow screen issue.
2. Removing Cameras from a Camera Stack
If you need to remove an Overlay Camera:
- Select the Base Camera.
- In the Stack section of the Inspector, select the Overlay Camera you want to remove and click the – button.
The Overlay Camera will remain in the Scene but will no longer be part of the Camera Stack.
3. Changing the Order of Cameras
The order of Cameras in a stack defines their rendering priority:
- Select the Base Camera.
- Scroll to the Stack section in the Inspector.
- Drag and drop the Overlay Cameras to reorder them.
The Base Camera renders the main layer, while Overlay Cameras render on top in the specified order.
Script-Based Camera Stacking
You can also manage Camera Stacking programmatically:
Add an Overlay Camera:
Remove an Overlay Camera:
Conclusion
By setting up Camera Stacking in URP, you can resolve the yellow screen issue in Atavism Unity 6 and enhance your rendering capabilities. Whether you use the Inspector or scripts, this essential feature ensures your scenes are rendered correctly.
This lesson provides the foundation to troubleshoot and implement Camera Stacking effectively in Atavism Unity 6.