Course: Implementing the HNGamers Xsolla WooCommerce Gateway Plugin
Lesson 5: How to Configure the Plugin
Introduction
Having successfully obtained and understood the support mechanisms for the HNGamers Xsolla WooCommerce Gateway Plugin, it’s now time to delve into its configuration. This lesson covers the essential steps to integrate the plugin with your WooCommerce store and Xsolla account, along with common configuration pitfalls and their solutions.
Account Setup with Xsolla
1. Creating an Xsolla Account
- Step-by-Step Guide:
- Visit Xsolla’s official website and sign up for an account.
- Follow the onboarding process to set up your merchant profile.
2. Obtaining IDs
- Merchant ID and Project ID:
- Navigate to your Xsolla dashboard.
- Locate your merchant ID and create a new project to obtain the project ID.
Configuring the Pay Station Plugin
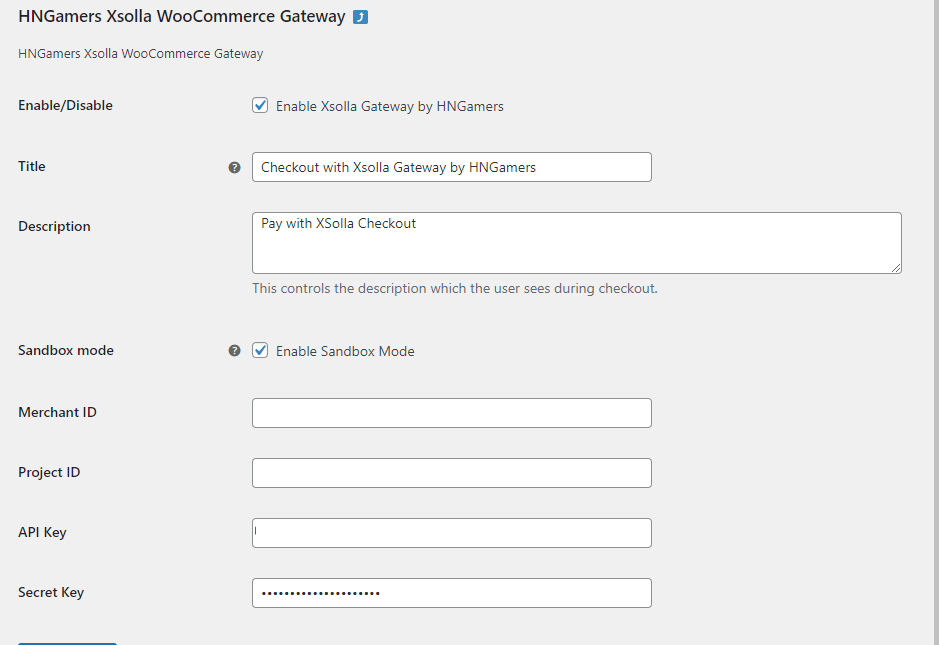
1. Plugin Settings
- Accessing the Plugin Settings:
- In your WordPress dashboard, go to WooCommerce settings and find the HNGamers Xsolla Gateway settings.

- Entering IDs:
- Input your Xsolla Merchant ID and Project ID in the respective fields.
2. Customization
- Pay Station Appearance and Flow:
- Customize the appearance and flow of the payment gateway to align with your store’s theme.
- Upload branded images and configure redirection policies for successful payments.
3. Redirect Policies
- Setting Up Redirections:
- Set the redirect policy to your cart page or a custom thank you page.
- Configure the delay for successful payment redirection and enable manual redirection if needed.
Configuring Webhooks
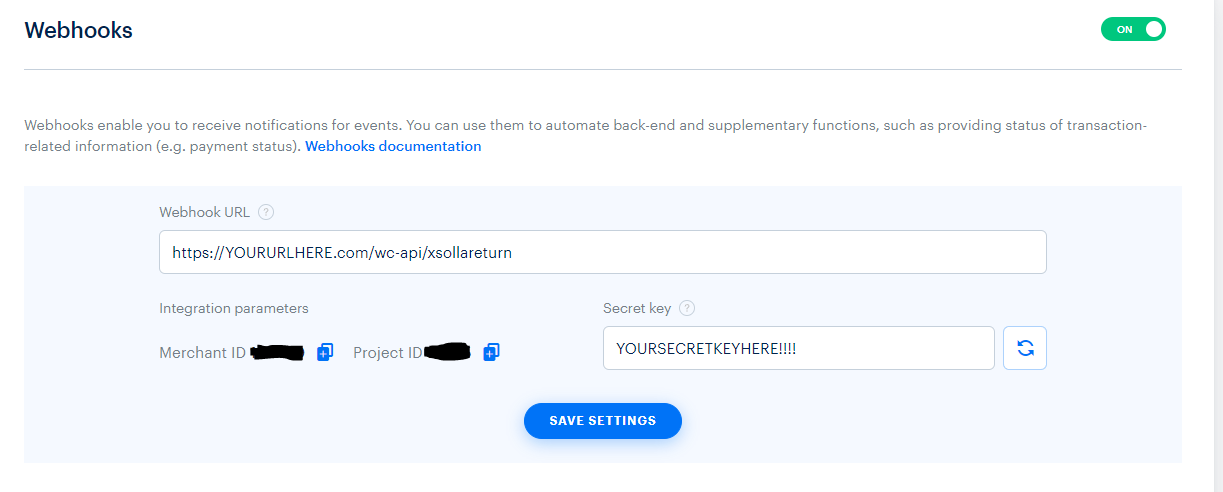
1. Webhook Setup
- Webhook URL:
- In Xsolla settings, set the webhook URL to
https://[YOUR_WEBSITE_URL]/wc-api/xsollareturn.
- In Xsolla settings, set the webhook URL to
- Selecting Events:
- Choose ‘Payments’ as the event type for the webhook.
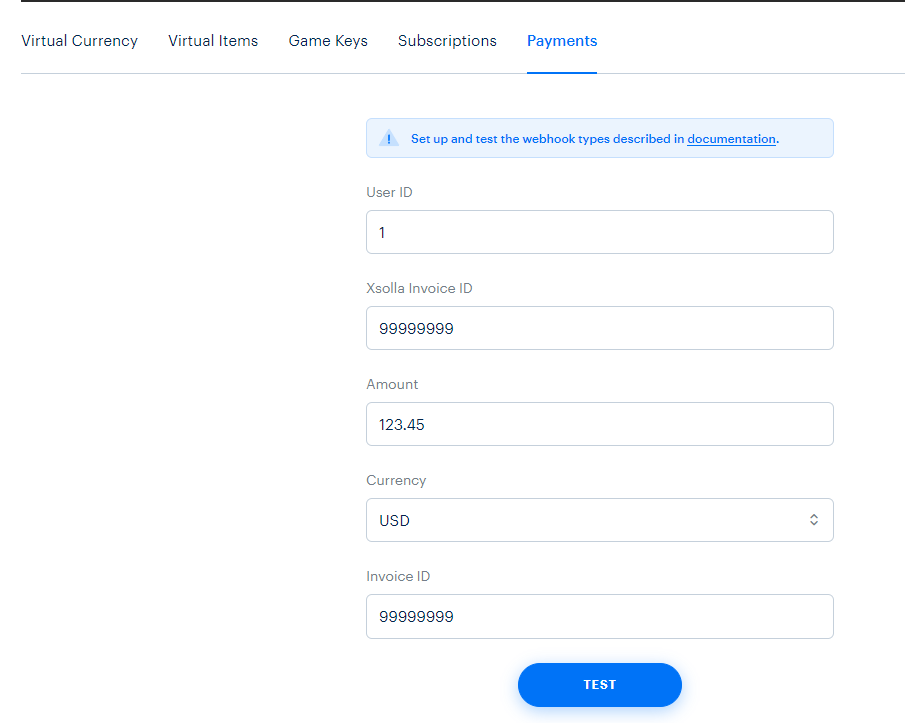
2. Configuring the Webhook
This is an important step and must be done as part of the setup process.
- Sample Data for Testing:
- Use a valid WordPress user ID (usually 1 for the site owner) for testing.
- Set an invoice ID to 99999999 and the amount to USD 123.45 to simulate a transaction. Since we need to verify this transaction twice, an order will not work. This will provide the verification needed to XSolla that your site is now connected and you can configure the gateway.
Common Configuration Pitfalls and Solutions
Pitfall 1: Incorrect ID Entries
- Symptoms: Connectivity issues or payment processing errors.
- Solutions:
- Double-check the Merchant ID and Project ID.
- Ensure there are no typos or extra spaces in the entered values.
Pitfall 2: Webhook Misconfiguration
- Symptoms: Failing to receive transaction notifications or updates.
- Solutions:
- Verify the webhook URL is correctly set.
- Ensure your server firewall allows incoming connections from Xsolla.
Pitfall 3: Redirection Issues
- Symptoms: Customers not redirected appropriately after transactions.
- Solutions:
- Check the redirect URL settings.
- Test different delay settings for successful payments.
Conclusion
Configuring the HNGamers Xsolla WooCommerce Gateway Plugin requires careful attention to detail. By following these steps, you can ensure a smooth integration between your WooCommerce store and the Xsolla payment gateway.
Next Lesson Preview
Thank you! – Thank you for using our services.
