Lesson: Importing and Setting Up the Unity Web Store Plugin in Your Unity Project
In this lesson, you’ll learn how to import the Unity Web Store package, configure it in your scene, and integrate it with the Atavism Toolbar for easy access. Follow these steps to integrate the store seamlessly into your Unity game project.
Install the Prereqs
- Open the package manager and click the + sign in the upper right
- Selected Add package by name
- Enter com.unity.nuget.newtonsoft-json in the pop up to install the requirement
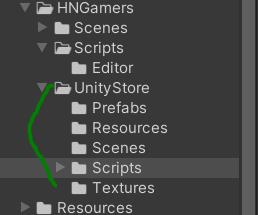
1. Import the Unity Package
The first step is to import the Unity Web Store package into your Unity project. Once the package is successfully imported, your project folder structure will look like the following:
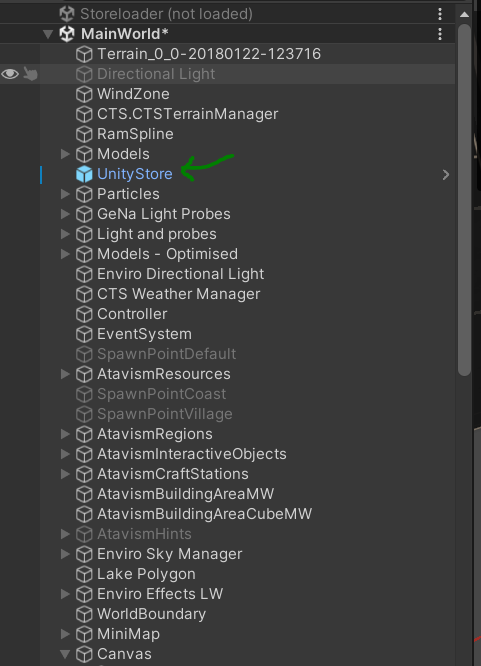
2. Add Unity Store to the Scene
Next, pull the Unity Store prefab into your Scene Hierarchy. This is a crucial step, as it allows your game to communicate with the store backend.
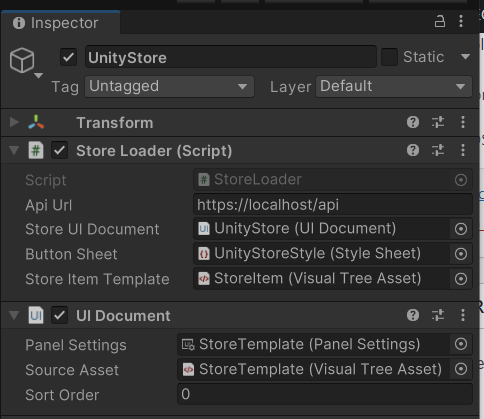
- After dragging the store into your scene, assign the Base URL for the store. This URL will point to the API endpoint of where your service is running. For example, if you are running the service locally for testing purposes, you would set it to:
https://localhost/api
If your running it on a dedicated server- https://website address/api
- https://fqdn/api
- https://ipaddress/api
-
If you are running this on a different port then add it to the url
- https://localhost:PORTHERE/api
- https://localhost:8443/api
-
Verify your UI is fully setup as below before moving on.

For live deployment, make sure to replace this with the actual IP or domain of your server where the service is hosted.
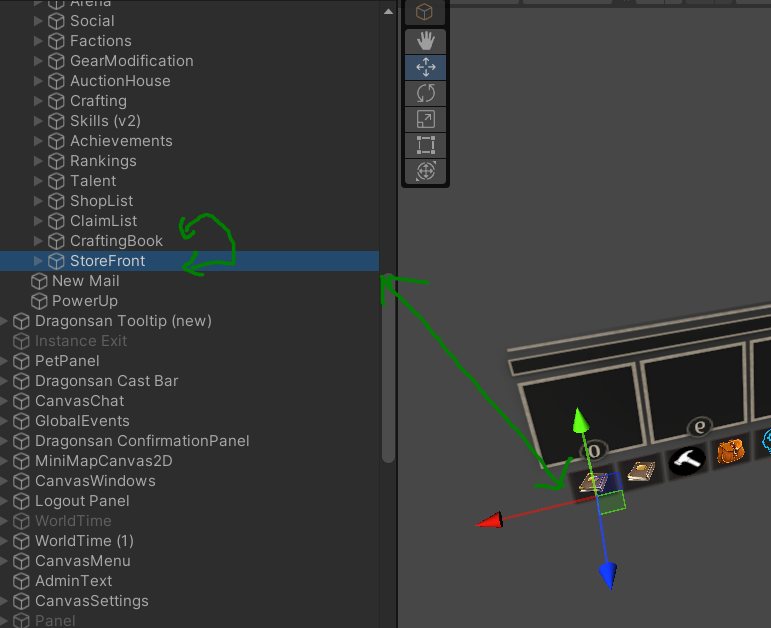
3. Add a Button to the Atavism Toolbar
To provide easy access to the store for your players, we will add a button to the Atavism Toolbar that opens the store window.
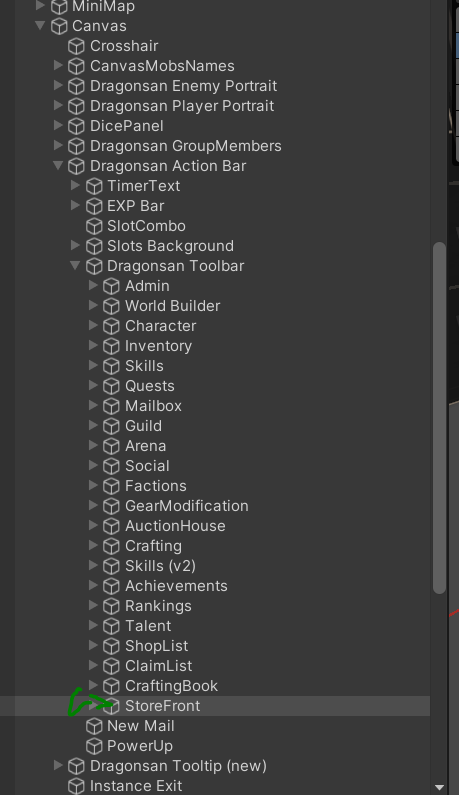
- Find the Atavism Toolbar Canvas by navigating to:
Canvas -> Dragansan Action Bar -> Dragonsan Toolbar
- Under this toolbar, duplicate one of the existing buttons, and rename the new button to StoreFront.
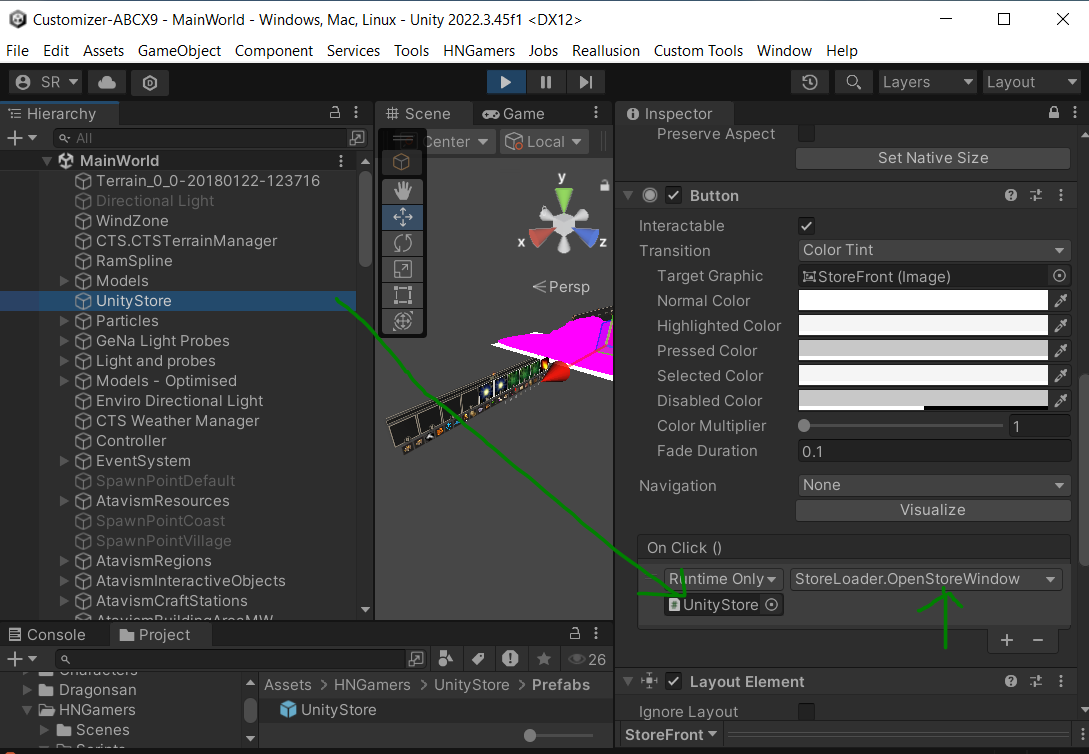
4. Link the Store Button to Open the Store Window
Now that we’ve added the StoreFront button, we need to link it to the store window so that it opens the store when clicked.
- Expand the newly duplicated button and find the Button Script component.
- Drag the Unity Store prefab from the Scene Hierarchy into the script field of the button.
- In the button’s script field, select
StoreLoader.OpenStoreWindow. This action will ensure that clicking the button will open the store window in-game.
5. Save and Test the Scene
Once you’ve linked the store to the button, make sure to save the scene. Run your game in the Unity editor to test the new button. When clicked, the StoreFront button should now open the Unity Store window.
By following this tutorial, you’ve successfully integrated the Unity Web Store into your Unity project and linked it to the Atavism toolbar for easy access. Your players can now interact with the store to purchase in-game items.
Proceed to the next lesson to learn more about configuring store items and managing in-game transactions.
