In this lesson, we will guide you through the process of setting up Google OAuth for your Unity Web Store. Google OAuth allows users to log in securely with their Google accounts, simplifying the authentication process and enhancing user experience.
1. Sign Up for a Google Developer Account
First, you’ll need to sign up for a Google Developer Account if you don’t already have one.
- Visit the Google Cloud Console.
- Sign in using your Google account or create a new account.
2. Create a New Project
Once you’re logged into the Google Cloud Console, the next step is to create a new project.
- Click on Create Project.
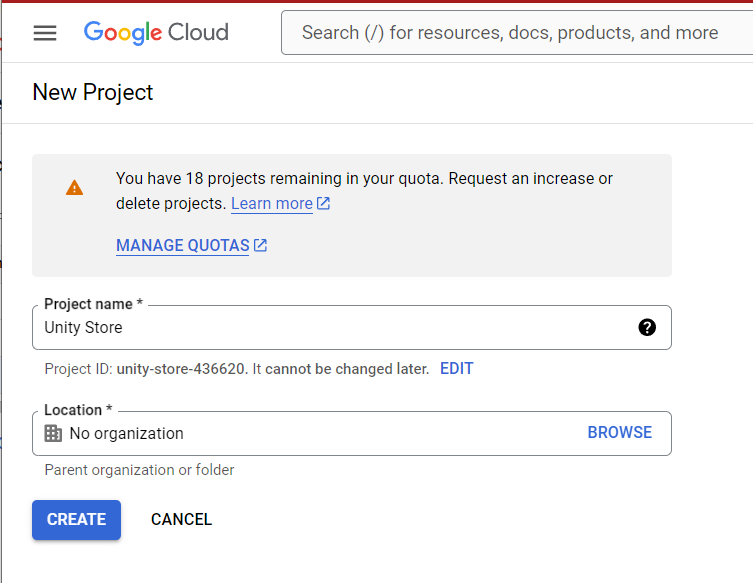
- Give your project a name (e.g., “Unity Web Store OAuth”), and click Create.
3. Enable APIs and Services
Now that your project is created, you’ll need to enable the necessary APIs for OAuth.
- From the dashboard, click on APIs & Services and select credentials.
- Select OAuth consent screen to configure the OAuth settings.
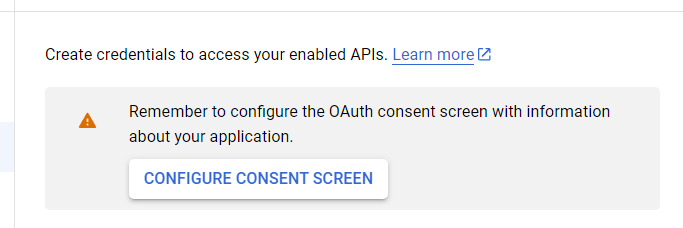
4. Configure the OAuth Consent Screen
- Choose External for the user type to allow users from outside your organization to log in with their Google accounts.
- Fill in the required fields, including Application Name and Support Email.
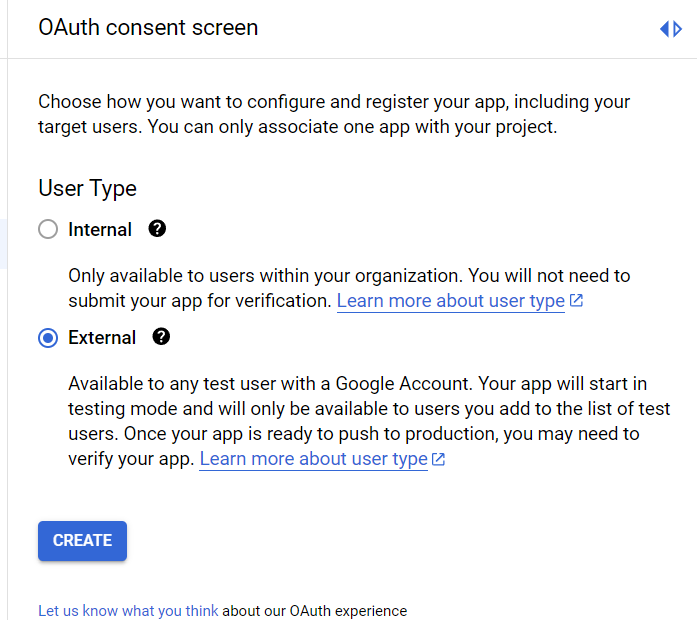
- Add test users (e.g., yourself and other team members) who will have access to the OAuth system during testing.
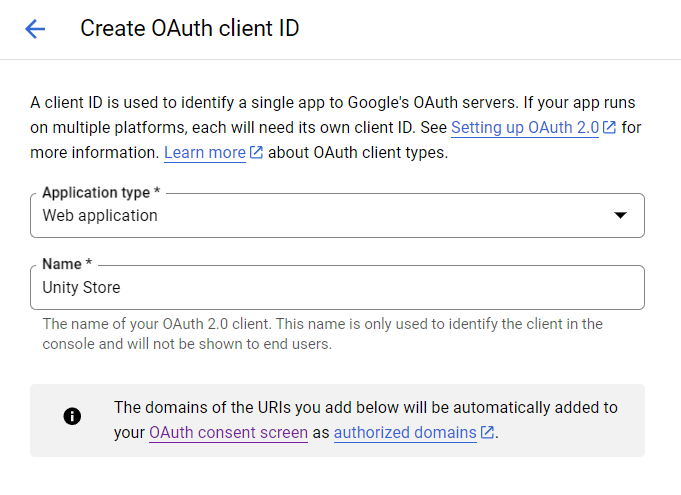
5. Create OAuth Credentials
Next, we’ll create the OAuth credentials that your Unity Web Store will use for Google sign-in.
- From the APIs & Services dashboard, click Credentials.
- Click on Create Credentials and select OAuth Client ID.
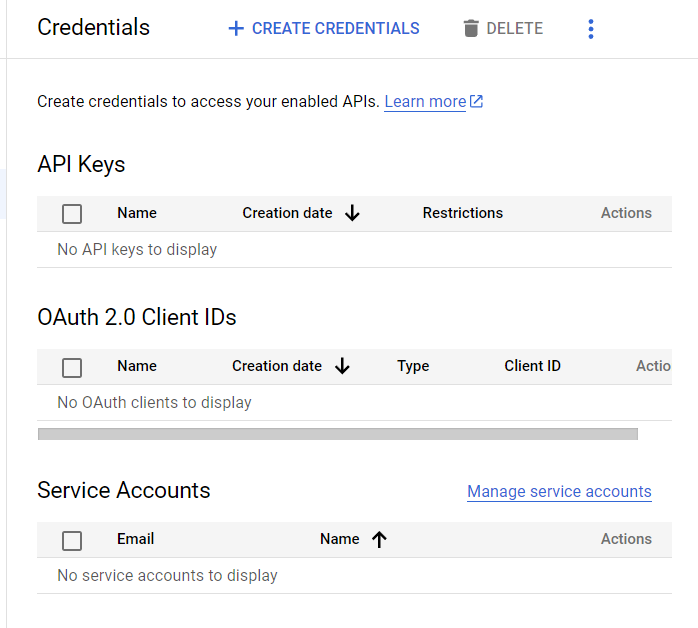
- Select Web application as the application type and give it an appropriate name (e.g., “Unity Web Store OAuth”).
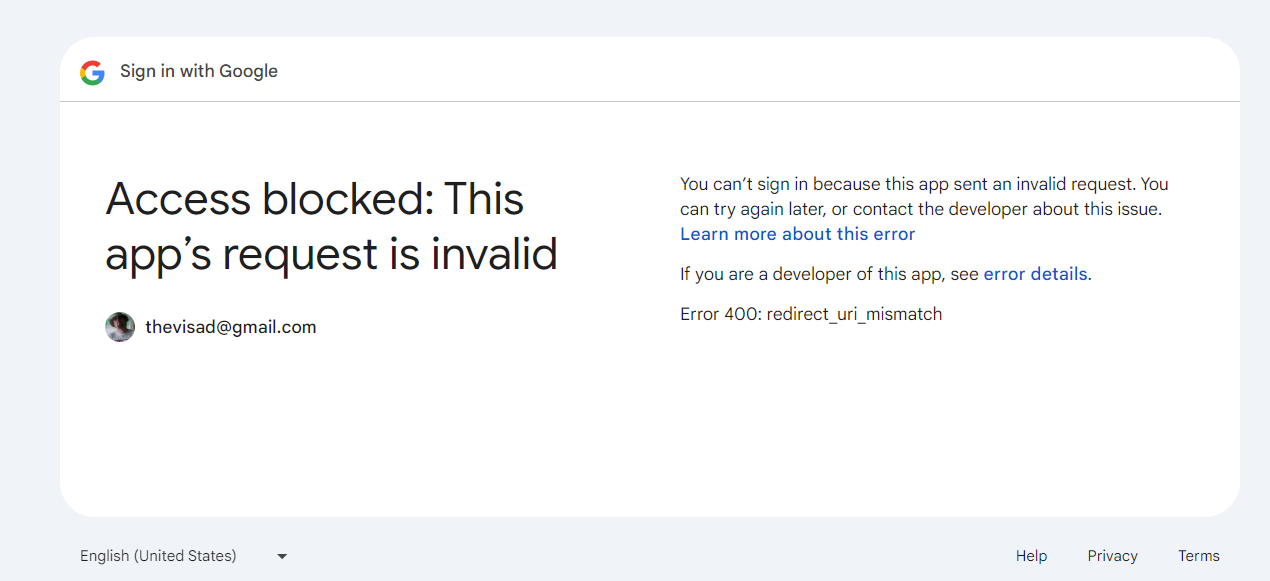
6. Configure Authorized URLs
Now, you’ll need to specify the URLs where your application will be running and accepting OAuth logins.
- Under Authorized JavaScript origins, add the URL where your web application is hosted (e.g.,
https://example.com:5051if using a non-standard port).
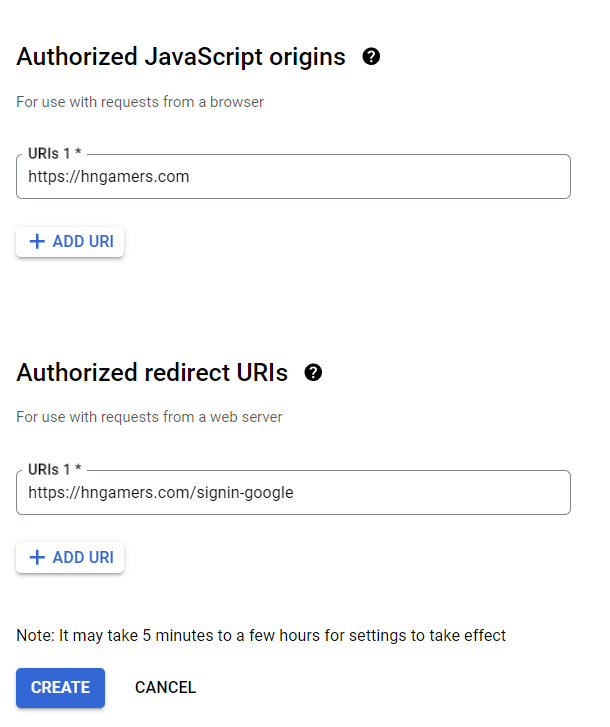
- Under Authorized redirect URIs, add the path where users will be redirected after successfully authenticating. For example:
arduino
https://example.com:5051/signin-google
Users will be redirected to this path after authenticating with Google. Make sure this matches the JavaScript origins URL.
7. Collect OAuth Client Info
After setting up the credentials, you’ll be provided with a Client ID and Client Secret. Copy these values as they’ll be needed to configure your Unity Web Store.
8. Modify appsettings.json
Now, we need to modify the appsettings.json file in your Unity Web Store to include the OAuth configuration:
- Open
appsettings.json. - Locate the section for Google OAuth and enter the Client ID and Client Secret.
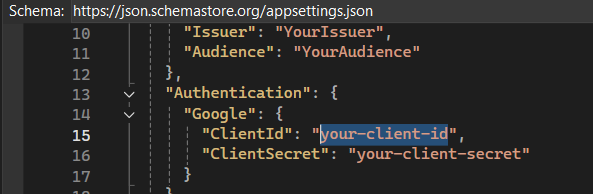
This configuration will allow your Unity Web Store to communicate with Google for OAuth-based authentication.
9. Test Google Login
Finally, browse to your store’s URL and test logging in with a Google account. Make sure the OAuth flow is working correctly by performing these steps:
- Navigate to the login page of your store.
- Click on Sign in with Google.
- Authenticate using the Google account you added as a test user.
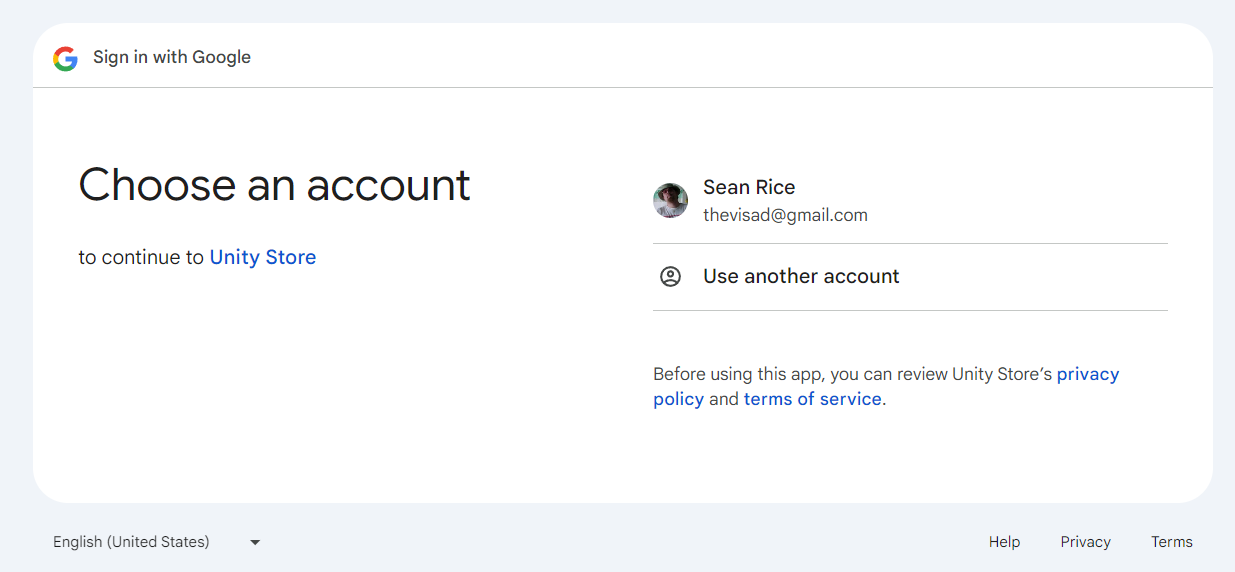
If everything is set up correctly, you should see a successful login.
If you encounter issues, you may see an error indicating that the user is not authorized, meaning the Google account has not been added as a test user, or the OAuth settings may need to be reviewed.
Summary:
In this lesson, you learned how to set up Google OAuth for your Unity Web Store by creating a project in the Google Cloud Console, configuring OAuth credentials, and linking it to your store. You can now offer secure Google sign-in options to your users.
In the next lesson, we will explore how to handle login errors and manage multiple OAuth providers like Facebook or Twitter.