When setting up your store for the first time, you’ll notice that the storefront comes preloaded with some default demo items. These items are placeholders and should be removed or replaced with your own products to provide a unique shopping experience for your players.
1. Removing Default Demo Items
The first step in customizing your store is to remove the demo items. You’ll find the default items already loaded in your store’s front-end, as shown below:
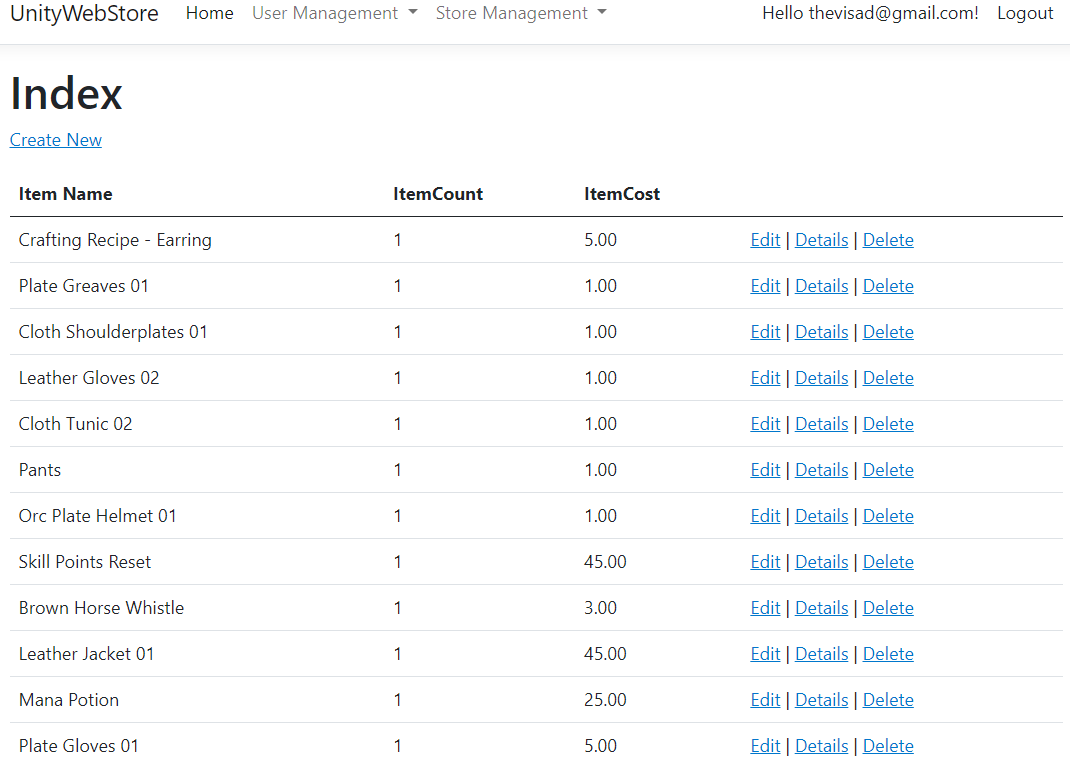
To remove these items:
Navigate to your StoreItemsMVC interface.
Locate each demo item, select it, and choose the option to delete.
Confirm that the item is no longer available in the storefront.
By removing these demo items, you can now start adding your own unique products.
2. Creating a New Store Item
After removing the demo items, you’ll want to populate your store with the items you want to offer to players. This can be anything from in-game items, gear, weapons, or other digital assets.
To create a new item:
Navigate to the StoreItemsMVC controller and click on Create New. This will open the interface for adding new items.
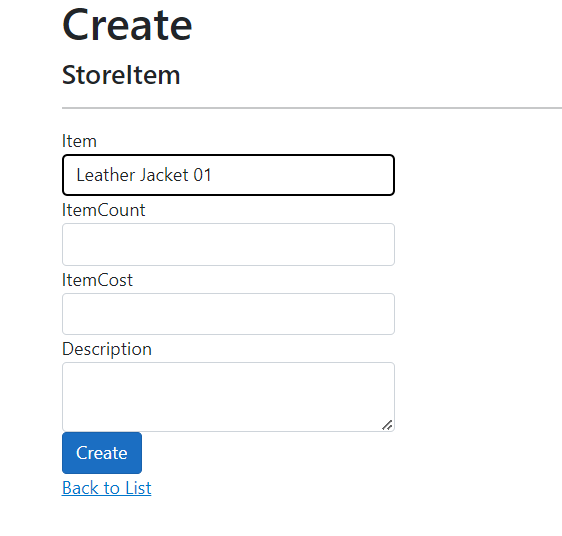
Select the Item: Use the dropdown menu to select the specific item you want to add to the store. This dropdown will display all available items from your game’s database.
Set the Quantity: Determine the number of items you want to send to the user in a single purchase (e.g., 1 for a unique item or multiple if the item is stackable).
Assign the Cost: Set the price for the item, ensuring that it reflects the value you want in the in-game currency or real-world currency if applicable.
Description: Optionally, you can provide a custom description for the item. If you leave this field blank, the item’s tooltip (from the game’s database) will automatically be used in the storefront.
Once all the fields are filled in, click Save to add the item to your store.
3. Verifying Your Store Items
After creating new items, it’s a good idea to verify that they have been correctly added to the store:
Go back to your storefront in the game or admin panel.
Ensure the newly created items are listed, along with their assigned quantity, cost, and description (or tooltip).
Players will now be able to purchase these items from your store, making it fully customized to your game’s needs.
Summary:
In this lesson, you learned how to remove the default demo items from your store and create new store items using StoreItemsMVC. This process allows you to fully customize the store’s offerings to match your game’s inventory and in-game economy.
In the next lesson, we’ll cover managing orders and transactions using the StoreOrderController, where you’ll learn how to handle successful purchases and track user transactions.